
To view the video go to - http://cgcookie.com/concept/2012/02/23/drawing-a-creature-part-1-silhouettes/


 Now onto something you hear a lot about in animation - Squash and Stretch. You also see it in the real world (a funny picture of this is shown on left). Actually the starting place of learning about it for all animators is with a bouncing ball. A basic explanation of it is that the ball is round at the top of an arc and as it travels it stretches as it speeds up and when it contacts the floor in squashes and as it bounces back up the next arc it stretches again and then back round and the cycle continues until the ball comes to a stop.
 To start doing this use Key Poses; for our bounce it is going to be when the ball is a circle and when it squashes on the floor as you can see in my drawing on the left. This is all done to give the ball weight and is very important but you must make sure you keep the same volume area when squashed as it is round.
 The speed the ball is going also depends on the amount of squash you have; in other words the faster it's travelling the more squashed and stretched it will be. I made the image on the right to explain this with squash on top and stretch below.
 As you can see, the marks we have used so far have all been in the centre of the poses so you can now see how they came in handy ;)
 A great tip I was recommended to do when planning your Slow-In and Slow-Out is to put marks along the arc so you can easily work out the balls position and timing. For Slow-In you want the marks to be quite close together and gradually have more space in-between and then the opposite of this for your Slow-Out. Here you can see I've added some marks to my drawing to explain this.
 Path of Action
 1 hour later a Q&A with Dhar started and I really enjoyed this one. Dhar was really helpful and gave me lots of advice. We talked about AM doing a Short Story course and I told him how I find it difficult so he recommended I read Story by Robert McKee. Charlie was also there and he said I should read both of Nancy Beiman's books, which Dhar also agreed with. One is about storyboarding and the other is about making characters feel alive. http://www.amazon.com/Prepare-Creating-Characters-Animated-Features/dp/0240808207At the end of this weeks second Q&A, Said went on to do a film review of 'How to Train your Dragon' but not like a normal review, this was a frame-by-frame look at parts of the movie to show arcs and not using symmetry, anticipation and staging.
 Characters move in nice arcs. Whether its their arms, tail or head. A good example of this was near the beginning where Gobber is having a drink and he slams it down and turns. Or how Toothless moves and swishes his tail.
Here is something I came across thanks to another Eager Beaver. How to succeed in Animation It is an online book... that is a great read. It is by Gene Deitch and he made it to guide you to creative success; to make the most of every chance you get, and to give you some grisly tours of the desiccated remains of some of his own shot-down productions.The best place to find out about them is in the book, The Illusion of Life: Disney Animation
Characters move in nice arcs. Whether its their arms, tail or head. A good example of this was near the beginning where Gobber is having a drink and he slams it down and turns. Or how Toothless moves and swishes his tail.
Here is something I came across thanks to another Eager Beaver. How to succeed in Animation It is an online book... that is a great read. It is by Gene Deitch and he made it to guide you to creative success; to make the most of every chance you get, and to give you some grisly tours of the desiccated remains of some of his own shot-down productions.The best place to find out about them is in the book, The Illusion of Life: Disney Animation

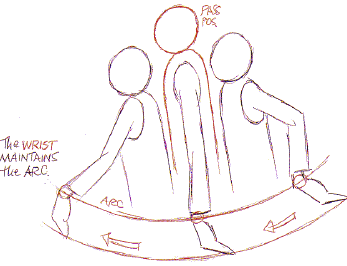 Arcs
Arcs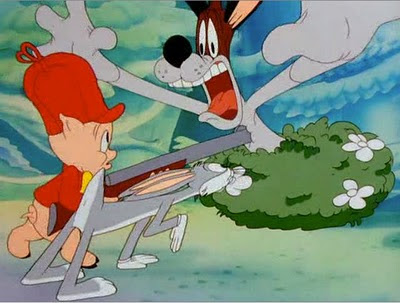 One of my favourite as I grew up around cartoons such as Tom & Jerry and the Looney Tunes, where they sometimes really exaggerate their characters actions. Sometimes exaggeration is necessary though but not always and you shouldn’t really over exaggerate as things can get silly… well unless that's what your after ;)This is something I've always struggled with and I am hoping Animation Mentor will help me to learn it too but I have stumbled across something amazing! I'm even going out and buying a new ink cartridge especially for it so I can print it out and put it on my wall. I know it is something I will refer to over and over again and here it is.
 The following is a excerpt taken from "A System For Planning and Timing Animation." It has been around for years and you can download the full pdf document at AnimationMeat.com.Here are 2 videos from a lecture at CalArts with Mark Andrews from Pixar. I went to a course where he lecturered with Escape Studios once. He was really good and I learned so much about storyboarding. I will post some of the notes I got from that lecture at some point too.Here are some videos on YouTube of John Lasseter giving advice to students and how to animate an inanimate object. After each video I have put notes from it. This is also the first Tip Jar post!
 I also got a little bored and made a can of Animation Mentor. Think I may use it when I post about something new AM has done and I love, so its like a can of AM awesomeness! For instance, Orientation. I got access to about 20 videos about how the AM website works and how to do the course and what to do if I have any problems. This would get an AM Can as it is brilliant although it would be a smaller can image :P
 I hope Animation Mentor doesn't mind that I used some of their logos for the can and tip jar, thanks if they don't mind me using them and they do then please let me know and I will change or remove them.
 AM Can
 Tip Jar