Showing posts with label Images. Show all posts

Tuesday, 14 February 2012

Happy Valensplines Day

He he :p

Thursday, 10 November 2011

Principles of animating a Bouncing Ball - 4

In-betweens

The last step is to do the in-betweens. In-betweens are the drawings/frames between the key frames which help to create the illusion of motion.

When doing the in-betweens using traditional animation you need to remember to transform the ball from its round shape to move of an oval shape but using 3D such as Maya it will do the in-betweens for you but you will need to use the graph editor to make sure the ease-in and ease-outs work and that the ball is stretching along the arc and that the transitions work. Your ball bounce with in-betweens should look a bit like my drawing below on the right.

The best way to work out your animation is to PLAN! You will hear this over and over again but planning is very important. It may seem at the time like you know what you want and can skip it but trust me when it comes to it you will end up animating and reanimating until you end up doing the planning any way.

Below is the ball bounce that I made in Flash to show what the final thing should be like. Sorry that its poor quality. Something that happens in the uploading to blogspot I think.

Tuesday, 1 November 2011

Principles of animating a Bouncing Ball - 3

Squash and Stretch

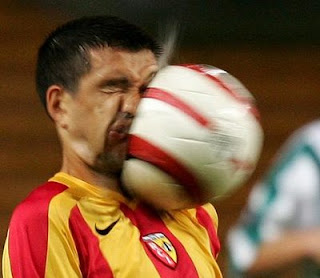
Now onto something you hear a lot about in animation - Squash and Stretch. You also see it in the real world (a funny picture of this is shown on left). Actually the starting place of learning about it for all animators is with a bouncing ball. A basic explanation of it is that the ball is round at the top of an arc and as it travels it stretches as it speeds up and when it contacts the floor in squashes and as it bounces back up the next arc it stretches again and then back round and the cycle continues until the ball comes to a stop.

To start doing this use Key Poses; for our bounce it is going to be when the ball is a circle and when it squashes on the floor as you can see in my drawing on the left. This is all done to give the ball weight and is very important but you must make sure you keep the same volume area when squashed as it is round.


The speed the ball is going also depends on the amount of squash you have; in other words the faster it's travelling the more squashed and stretched it will be. I made the image on the right to explain this with squash on top and stretch below.

Next up you need to add the stretches which are the main breakdown drawings/poses, in a sense they are really in-between drawings that explain the action the ball is making. In-betweens are the poses that are between the Key Poses. Below is an update of the image I made with the Break Downs added in yellow.

As you can see, the marks we have used so far have all been in the centre of the poses so you can now see how they came in handy ;)

Any way, back to stretch; unlike with squash that mainly shows weight, stretch shows the speed a ball is moving although you do also need to take in its weight.


A great blog that has some posts on Squash and Stretch is HERE. It has some great examples and really explains what it is and its principles so if you want to know more I strongly recommend visiting it.

Principles of animating a Bouncing Ball - 2

Slow-In and Slow-Out

The next principle of animating a bouncing ball is Slow-In and Slow-Out. This is the action the ball takes on the Path of Action. In the case of the ball, the beginning of the arc is called Slow-In and after the ball does its bounce it goes into Slow-Out, this is because it loses some of its momentum so slows as it approaches the top.

A great tip I was recommended to do when planning your Slow-In and Slow-Out is to put marks along the arc so you can easily work out the balls position and timing. For Slow-In you want the marks to be quite close together and gradually have more space in-between and then the opposite of this for your Slow-Out. Here you can see I've added some marks to my drawing to explain this.

REMEMBER - The closer together the marks are the slower it will move!

Friday, 21 October 2011

Principles of animating a Bouncing Ball - 1

Carrying on with arcs I will present to you my research on how to animate a ball, one of the first places to start animating and is made up of arcs! It does also use some of the other principles such as timing, slow-out, slow-in, squash and stretch.

Path of Action

Firstly you need a path of action. This is where the ball will bounce and is just arcs. We will just focus on doing one bounce for now as once you know how to do one you can do more.

If you wanted to do more bounces, the arcs would need to stay in line like the red line shows with the arcs in the bottom drawing on the left.

Nice arc reference

I came across this image last night of an Elephant Seal. It has flung dirt over itself and the photographer has caught the arc of dirt it left in doing so. If you look carefully enough in films, animation and real life you will see examples of the 12 principles everywhere. I've decided that I will start saving any references I find of these that I think are good and will help me in the future. If you are looking to be an animator too then I'd suggest doing the same, reference is always handy and try drawing or animating from them too; practice makes perfect :D

Thursday, 15 September 2011

Moving Picture Company - Cat's Pride

People who know me will know that I love cats and that I am a fan of the Moving Picture Companies work so when I saw they had made TV spots for Cat's Pride cat litter with animated cats in I was happy and impressed. It is done wonderfully and is the type of thing I would of loved to of worked on. They even used 2 real cats to ensure the right actions and reference; and they were trained for 4 weeks to make sure they got the right actions. They went with the concept of both ‘Pass Out’ and ‘Massage’ and it means the cats are anthropomorphic and perform amusing actions. They didn't go with drastic anthropomorphism and I think it's done wonderfully with just the right amount of humanism. I hope MPC bring out a 'how they did it' video/podcast like they have with some of their advertising and movie work, its fascinating.


To view the article by Moving Picture Company and the 2 tv shots they made please CLICK HERE.

Wednesday, 14 September 2011

Got my Certificate for Maya Springboard

Sadly, we didn't get a last Q&A so I never found out what Said thought of my 1 leg animation but I did get a new news item which was a link to my certificate and here it is!


I'm sad that Springboard has finished and that I won't have any more lessons with Said but I am excited about going onto Class 1. Only thing is... I've not heard from my loan company yet and I'm worried that I won't get it before class starts and will have to wait another 3 months! That feels like a lifetime to me! I have been trying to look at the plus side though, for instance, if I go into the next term I will graduate when it is the AM barbecue so I could go to that and graduation. It will also give me 3 months to practice and do more pose drawings.

Friday, 2 September 2011

Film Review of How to Train your Dragon in Q&A

At the end of this weeks second Q&A, Said went on to do a film review of 'How to Train your Dragon' but not like a normal review, this was a frame-by-frame look at parts of the movie to show arcs and not using symmetry, anticipation and staging.

Some of the comments Said made: -
  • Hiccup would move his eyes and then his head would follow to look at Toothless.

  • 'Keep it simple, keep it stupid'. What he means by this is to keep backgrounds unbusy so the characters are the main focus.

  • Characters move in nice arcs. Whether its their arms, tail or head. A good example of this was near the beginning where Gobber is having a drink and he slams it down and turns. Or how Toothless moves and swishes his tail.

  • Don't keep things symmetrical unless your looking for seriousness. Like when Toothless is staring at Hiccup in a serious manner to make him eat the fish but when he bites into it, Toothless relaxes and sits back and his pose is not symmetrical at all. Like one ear was higher than the other and even his eyes were different sizes!

  • Said also explained how Hiccups father, Stoick is all powerful, big and manly so when he was sat in the dark in his house in front of the fire and Hiccup tries to sneak in he was filling most of the screen (the animator had also nicely posed him in an arc but still not symmetrical). Hiccup is small and weak so when he comes in he is small in the background to represent him. It's easier to explain when you see it, sorry I should of taken more screen shots.
I love How to Train your Dragon and it is one of my favourite movies! If you love it too or even just love dragons or concept art then I recommend this book. The Art of How to Train Your Dragon (How to Train Your Dragon Film)

Thursday, 1 September 2011

Week 10 - Make '1 Leg' jump!

Now this week's assignment is our last and one I've been looking forward to for a while so sad but happy too.
This week we have to make a character jump but he only has one leg, a ball for a body and no head or arms, you can see what it looks like below. I didn't want to make him just jump so I decided to make him do a backflip. Below is the storyboard I made as my plan for how it will look and an animatic to show you the timing :)

Wednesday, 31 August 2011

Animation Arc Tracker

During our class yesterday, my classmate Charlie told us about a plugin for Maya that is an animation arc tracker. You can do the following with it: -

  1. Track an object with an auto-update option
    (Works in cases where the object has its owns keys, sometimes without)

  2. Slow Thorough option
    (Works in every situation at price of not updating and taking longer)

  3. Time range works off maya time slider range but able to override

  4. Change colours for path, key tracks, in-between tracks

  5. Zoom controls for active camera/viewport

  6. Attach To option for moving cameras

  7. Dockable UI


To download the plugin go to - www.creativecrash.com/maya/downloads/scripts-plugins/animation/c/arc-tracker

Monday, 22 August 2011

Storyboard for Robot Arm

Below is the thumbnail storyboard I made for my Robot Arm. It is for a longer version than the one I made as Said said that we can ditch the 100 frame rule and have freedom to express ourselves! Love it!

Wednesday, 17 August 2011

Fixed the ball

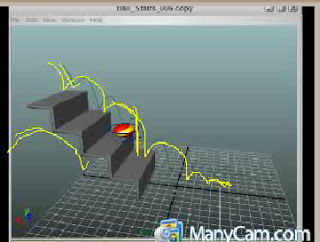
I fixed my ball. I noticed that the ball was stretching too early and that the bounces were like it was heading into wind so I checked the graph editor and i had forgotten to make the stretches ease in and out so I did that and noticed a missing stretch so fixed that too. I then changed the bounces in the graph editor too so now I think its lots better. Below is my 1 ball bouncing from a side view and below that is with a copy of it imported into the original but at a different angle so you can see both balls.


Please comment if you notice anything I have missed.


Some comments from my classmates

Charlie - Nice job Emma! Couple things that I noticed:

1. Turn off the grid for your playblasts, it'll make things easier to see.
2. Zoom the image in more. Don't forget you can Alt, L, M, and R buttons to make it fit better. You want to be as close to the action as possible to see it clearly.
3. For now I'd take out the stretch and squash and get comfortable with your timing and spacing. Remember each bounce the ground is taking away some of the energy from the bounce so it shouldn't keep bouncing full force.
4. The ball speeds up pretty fast then suddenly slows down as its traveling across the screen. It should gradually get slower along the way.
5. Each subsequent bounce should be around 70% less than the previous one give or take. Bow your curves out on the graph editor and break your tangents for more control.

Love how you thought outside the box by having the ball bounce down the steps, nice thinking! Good luck!

Marcelo - Nice!
Just watch out ball skidding on frame 94.


Said also did this drawing on top of someones work to explain how a ball should bounce. I thought I'd post it as it will be helpful for people who read this blog and myself in the future.

Tuesday, 16 August 2011

Ball Bouncing Down Stairs & Critique

I decided that I would make my bouncing ball more interesting so I animated it bouncing down some stairs. You can see it below.


I knew somethings weren't right about it but as I ran out of time I still showed what I had done to Said during todays Q&A and he had some points about what I did wrong.

Firstly a ball goes into a bounce quicker than it comes out so I need to move my first stretch of a bounce back a frame and not stretch the ball so much on the bounce out. I had thought that might be one of the problems but as my Q&A was starting I needed to upload what I had. Its good to have my suspicion confirmed too :)

Secondly, my bounces are too sharp. Said drew on my animation to explain what it should be like (See left), this was another thing I had noticed and was planning on changing. I'm thinking of missing a step too as it's unusual for a bouncy ball to hit each step. It speeds up a bit and goes further before it slowly bounces to a stop. Even Said in his drawing suggested this.

Thirdly was the view. Although I had planned on doing what Said had said but as I was uploading it quickly so just used the view I was in. Said said that Mentors can get annoyed when a ball just starts from the sky and doesn't roll to a stop or just go off screen. So I need to change it so its looking at the stairs sideways on, put the ball so it starts off frame and make it roll to a stop or roll off screen. Also, change the stretches and jump spacing.

Another point Said made was PLANNING! We were told that we must plan animations before we do them. Which, yes I know... if I had planned out my animation using thumbnail sketches I would of realised that the spacing was off and also the ball stretches so I have learned my lesson to not try and cut corners by not planning. Its actually going to take me longer to fix my mistakes than it would of taken me to of planned it first.

Graph Editor & Bouncing Balls

So we are in Week 8 and this week the is again 2 assignments. The first is to make a ball bounce and to do this I had to use the graph editor a lot. I did at first use the ball rig we were given but for some reason the was no squash or scale controls in the channel box so I started again but this time I used a ball rig I had gotten from the online Escape Studios course I did as it has squash controls. It is quite a lot different to the AM rig as I find it easier to control as Escape put handy control handles on the ball. You can see the difference in the image below.


Any way, after we had one ball bouncing, we had to save it as another name and then import one of the ball bounce files into the other so I then had a second ball doing exactly the same thing. But the second ball needed to bounce a little different than the first so I had to change it. This class really taught me a lot about the graph editor and what it does although I had learned it before it was good to have a refresher and to find out a few new things.

What my graph editor looks like after one bounce (with Translate X & Y selected)

The reason the is a tiny bump in the middle is because I was taught in my Escape course that it is better to make your ball be forced to touch the floor on the frame before it lands so in this case it landed on frame 10 so I forced it to the floor on frame 9 by key framing the Translate X & Y to 0 but with the stretch still on but then still squashes on frame 10. It did mess up the path but I fixed this by using the graph editor and making it look like it does above. This just makes it easier to read the squash on the floor. As you can see in my video below.


What my graph editor looks like after four bounces (with Squash Bottom selected)

What my graph editor looks like after four bounces (with Squash Top selected)


And here is what my four bounces looks like.

Monday, 8 August 2011

Shading and Lighting Assignment

Our next assignment was to add shading.ie. colour, which as you know I did last week. Looks like I took my assignment to the next level last week by accident but meant I had less to do this week. I did put the room into a box and gave it windows and a door hole. I also fixed the 180 degree rule I broke but I am still having a problem where the eyes are just white, will check with Said as to why that is but at least the Mental Ray fixed the crazy pink head problem.

The other half of the assignment was lighting. I've never been very good at lighting so I found this hard. I can make lights and I know which type of light is best for representing a certain thing. Such as Point Lights as lightbulbs or Directional Lights as the sun. I put 2 Directional Lights outside the windows to be the sun shining through and a Point Light for the ceiling light.


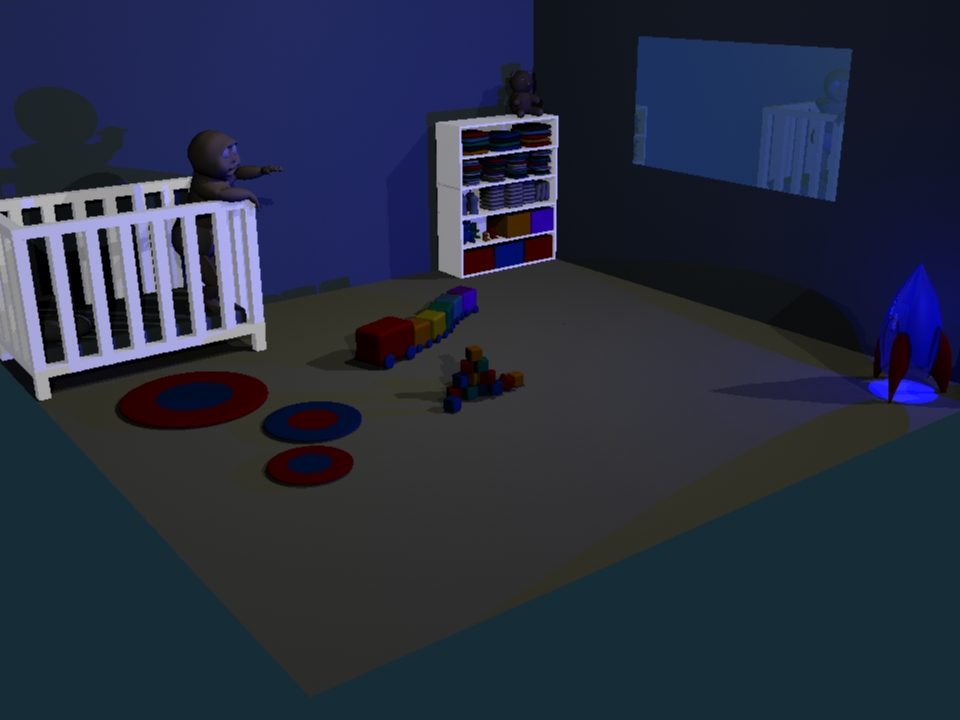
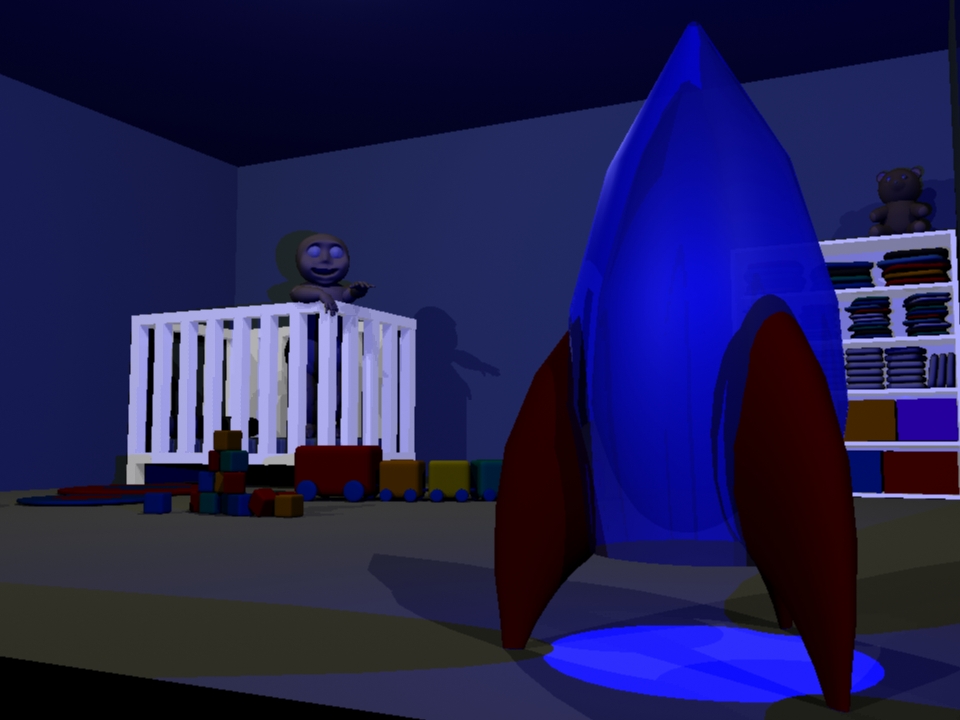
I also made a Rocket shape floor lamp and put a blue Point Light inside it. I thought it would give a bit of interest to the scene. Just for fun I made it dark in the room with just the rocket light too. Oh and you will notice I re-positioned the baby. I just imagined it in the crib trying to reach for the rocket.


Said also kindly used me as an example to show how different light will effect a person as I was sat in my mums kitchen the was a window behind me and the door to the garden was open on my right so me on webcam was a good example. I just had to stay very still as he drew on me to explain what he meant. He then got a bit carried away and gave me a moustache and glasses. As you can see below.

Monday, 1 August 2011

What I came up with

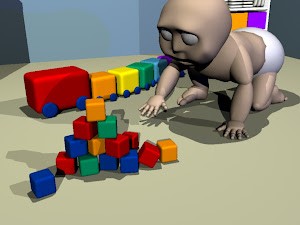
Well, here it is. No idea why I decided to go with a baby or even where the idea came from. I really enjoyed the challenge though and especially the making of his room and all the toys. Oh and if your wondering the coloured stacked things are meant to be clothes.

I didn't have many problems but one I do have is that when I render and image of my scene my babies head goes strange colours. Also, for some reason all the objects I smoothed become un-smoothed when I render. I'm planning on asking what has happened to cause these problems in my lesson tomorrow. I would like to fix it. Here is a rendered image that shows what happens.

Please comment and let me know what you think of my baby and my scene. Remember it was my first go at modelling a person in Maya though :p


Monday, 25 July 2011

2nd Springboard Assignment!

This week is split into 2 sessions. I wasn't expecting that but its fine :)
The first session is about modelling and teaching us how to do it so we can make a basic character. I'm actually really enjoying messing with it to make a character that appeals to me. I've never really gone into modelling with Maya before so learning new things. My fellow classmates have set a challenge too. To see who can make the cutest character, my original plan has now changed slightly... I love challenges!

The 2nd session is to build a set for my character and place 2 or 3 cameras in different angles. Then put my character in the scene. I reckon this part will be quite simple as I already know what it discussed in this tutorial but should still be fun.

When I've finished it I will post a few images to see what you think and so you can see what I came up with.

Oh and also found out something... We don't get grades in Springboard! Gutted but not going to stop me doing my best :D
Also, here is a picture of me brought up on webcam during our Q&A :) They are so enjoyable and fun I can't help but grin!

Monday, 18 July 2011

Finally got my first lecture video!

Woohoo! It all began this week and I've been taking my time to make sure I get it all right. I really do want to do my best.

Any way, our first lecture video was full of stuff! Below is what was discussed in it.
  • Simplifying workspace, short cuts
  • Basic UI elements
  • Preferences: Undo = infinite
  • Tracking and Zooming in the different views
  • NURBS definition
  • NURBS Primitives: Sphere, Cylinder, Torus, Cone
  • Basic interaction tools: Select (q), Move (w), Rotate (e), Scale (r)
  • Panel display options: 1/2/3, wireframe (4), shaded (5), textures (6), lights (7)
  • Marking Menu: what the heck?
  • Channel Box: Translate, Rotate, Scale
  • Outliner: part 1
  • Saving versions - .ma vs. .mb: Always save as .ma
  • Using the integration “Help” feature in Maya for tutorials, reference, etc.
  • Character / Tools section: downloading and opening .zip files
  • How to make a .zip file for upload
  • Submit your work (Assignment Sessions)

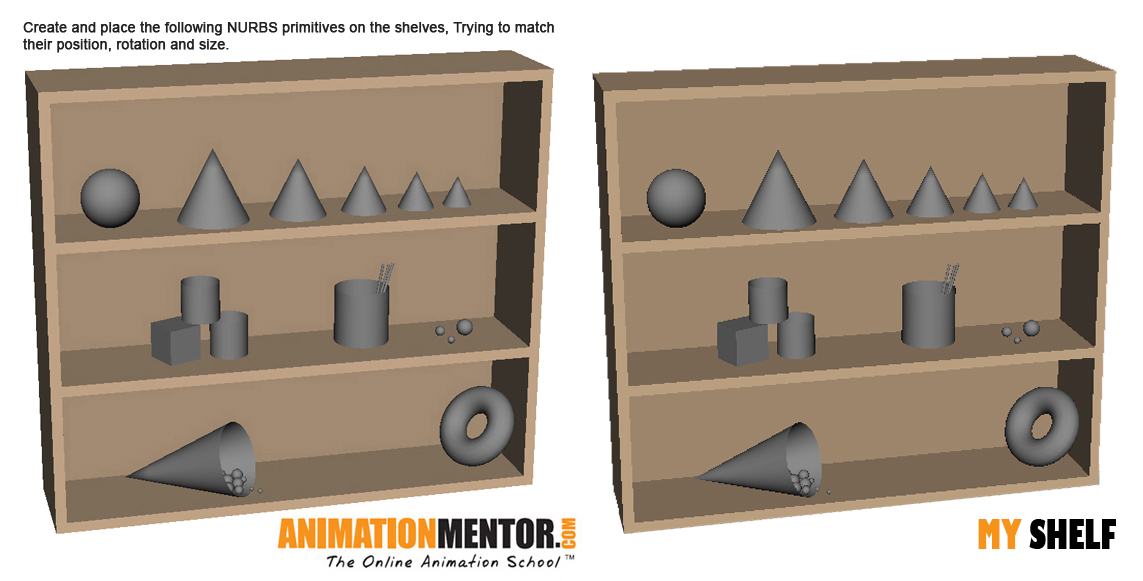
From what we were taught in the lecture we were given an assignment. This was to create a series of NURBS and transforming them to match an image we were given. Then save it as a zip file and upload it. I took my time with this assignment as I wanted it to be perfect or as close as I could get any way. (Some of my perfectionist habit coming through). I took Screen Shots as I made each NURBS object so I can show you how I did it and where I started but firstly here is the image we were given and my final version.


Here are my progress shots with some close ups and even when I used a camera to check that balls weren't going through the cone or other balls.


To do this assignment I actually came up with an idea. I downloaded an app called 'Afloat'. It basically allows you to make some software transparent so I made the image we were given transparent and then placed it over maya and then adjusted each object to fit over the image. I also just put the image over the top normally and kept minimising and opening it over maya to check it looked right but it was a huge help in making it as exact as possible. I did of course make sure through other views that they were sat on the shelf and not going through other objects though.